 A few years ago, I wrote about the Intricacies of Display in SDL Trados Studio, explaining how to move windows around and customise the layout in the editor view. Making Studio fit comfortably on your monitor is even more important now, because Studio 2017 comes with two new windows: Fragment Matches and the Advanced Filter Display.
Clearing the decks
It all seemed overcrowded when I first started testing Studio 2017. The Editor window was swamped by other windows and I wanted to see concordance and fragment matches at the same time, not one underneath the other.
Here are some strategies I use and recommend to gain extra space:
- Hide the ribbon (toggle it on and off with Ctrl F1)
- Set infrequently-used windows to Auto Hide (this is default behaviour for the Termbase Viewer, Preview and Advanced Display Filter)

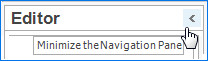
- Collapse the file navigation pane on the left
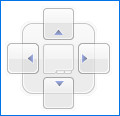
- Move the windows around by dragging them over the placeholders that appear, or even onto a second monitor (see Paul Filkin’s 4-minute video for a demonstration).
Resetting the layout
If your experiments get out of hand, don’t forget you can reset the layout by clicking View>Reset Window Layout. This will take you back to the layout saved in your user profile, not to the default layout, unless you’ve never made any layout changes before.
My current set-up looks like this (be sure to click on the image to get the full picture):

Following another expert’s advice, Jerzy Czopik this time, I’ve customised two different layouts, one for my two-monitor desk layout and another for my 12” 4K laptop. You can save different layouts under different user profile names.
Setting up two profiles is quite easy:
- Make the changes you want to the current window layout.
- Export this user profile by going to File>Setup>Manage User Profiles.
- Click Export user settings. Choose a place to save the profile. (Default profiles are saved in C:\Program Files (x86)\SDL\SDL Trados Studio\Studio5\UserProfiles, but you can’t save customised profiles here or make changes to the default ones.)
- Make new changes to the layout to customise a second profile.
- Export the second profile.
To switch between user profiles:
- Go to File>Setup>Manage User Profiles
- Click Change user profile
- Click Do not back up, overwrite my current settings (This sounds misleading, but it seems to be the only way to do it.)
- Select from the drop-down list or browse to your other profile
Don’t forget that a user profile contains much more than the window layout: customised shortcuts, layout, default languages and everything you’ve defined under General Options, such as QA settings and autotext lists.
Customising the ribbon
The ribbon layout and content can also be customised in Studio 2015 and 2017. I wrote about ribbon customisation here.
Project and File views
These views can be customised too in Studio.
![]() As in Windows File Explorer, you can drag a column to the left or right, increase column width by dragging the division boundary and order files or projects in ascending or descending alphabetical order by clicking on the column title.
As in Windows File Explorer, you can drag a column to the left or right, increase column width by dragging the division boundary and order files or projects in ascending or descending alphabetical order by clicking on the column title.
You can also decide which columns to display by right-clicking the top of any column. 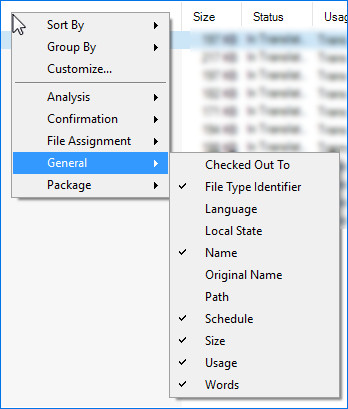 Missing features
The current options for column content are largely based on package workflows. I rarely have packages, but tend to use on-going projects, classified by client and/or subject matter. I simply add new files to existing projects so that TMs, termbases and other settings are already defined.
In the Files view, I’d love to:
- order files by date added.
- see total number of files. At the moment you have to return to the Projects view and click the Project Details tab at the bottom.
- see number of files selected, as you can in Windows File Explorer.
Welcome view
The Welcome view has improved over the years. It’s the place to go if you want to access the AppStore, your SDL Account or the SDL Community support forum by simply clicking a link.

There’s not much to customise in the Welcome view, but there’s a great app, called Menu Maker, for tweaking and ordering the apps in the left-hand pane. You can even launch standalone apps from inside Studio with it. I wrote about Menu Maker in a post back in 2013, but it works for Studio 2014, 2015 and 2017.
I hope this brief guide to customising Studio layouts helps you clear the decks and get a better view of Studio.
Translators talk Trados
If you found this blog post useful, you might want to check out the SDL series called Translators talk Trados, where other translators look at different features and explain how they use Studio in their workflow. A great chance to learn more about Studio from colleagues!


Pingback: (CAT) – SDL Trados Studio 2017: A look at layouts | Emma Goldsmith – 📚 Glossarissimo!
Nice article Emma… hope you don’t mind me adding this one too – https://multifarious.filkin.com/2013/10/24/moving-windows/ – the more the merrier to help people see the benefits I guess. I particularly like that you extended this article to include the use of profiles, which is an excellent tip, and brought up a few missing features that I’d also like to see. This article seems to be the definitive resource on the Studio layout 🙂
Thanks for the link to your blog post, Paul. As you say, the more the merrier!
Hi Emma
I really appreciate your blog. Thanks for your fine work.
I tried to save a User Profile. Should it be Go to Files (instead of Help)? in the below?
Go to Help>Setup>Manage User Profiles
Kind regards
Poul
Thanks for spotting that, Poul! I’ve corrected it now.
Interesting post, Emma. Loved your valuable tip to use ‘user profiles’ for layout settings. Thanks!